Jenkins Introduction
Connecting to Jenkins
Go to the Jenkins URL and log in using the corresponding credentials. Upon logging in successfully, you should see the landing page (Dashboard) of Jenkins .
Info
Please note that your browser will have its own settings for display languages. So if you have configured it to prefer another language than English then Jenkins will be showing the corresponding translation.
What we see is a fresh Jenkins deployment without any pipelines defined so far. If you already see some pipelines, your colleagues have probably already experimented.
Please understand this instance for now as the perfect green field for you to explore Jenkins step by step. We will walk you through the most relevant aspects of the Jenkins UI.
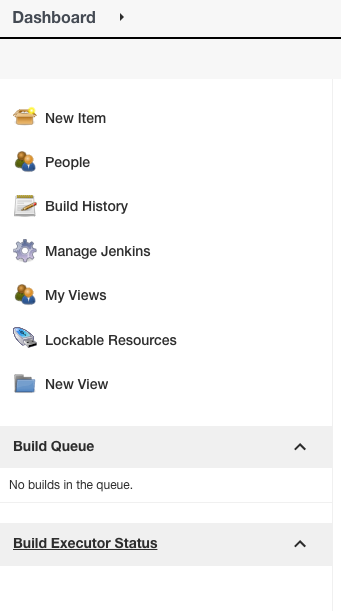
To navigate Jenkins, we will interact with the sidebar on the left.
Plugins
The first item to inspect is the Plugin Manager. Navigate to Manage Jenkins from the sidebar. Here within the System Configuration area you should see an item Manage Plugins.
Opening this Plugin Manager will display all currently installed, updatable, and available Plugins that you can extend Jenkins with. Let’s stay on the Updates tab and look through a few plugins that are currently installed. Feel free to look at the list and read the short description to get an idea of what that plugin does. You can also click on the name of a plugin to open the documentation.
Most of the plugins should offer a straight-forward explanation on what they provide, such as the Credentials Plugin.
Two plugins that we want to highlight are :
- Git
- Kubernetes
These two are essential to what we want to introduce in the following chapters.
The Git Plugin provides new functionality to our pipelines which enable easy integration and access to a git repository. It adds new UI elements to the pipeline creations menu to input git repositories along with the necessary credentials.
A note on agents: Jenkins runs a pipeline inside agents. Agents are in essence processes that execute your pipeline steps. In overall, that workloads can run on many compatible environments as there are several Jenkins Agents available.
The Kubernetes Plugin provides functionality that allows us to easily setup and configure build agents on top of the underlying kubernetes cluster. That is a setup option we decided for this training: CICD pipeline runs will actually run inside a Kubernetes cluster. But that is not the only option Jenkins can be installed. Pipeline runs could also be executed on bare metal, VMs or other options. As we are heavily relying on Kubernetes, we will see this plugin in action later on.
A note on plugins: While you can heavily extend Jenkins with a multitude of plugins, each plugin comes with a set of additional dependencies, for which the plugin might require a specific version. Therefore, having a large amount of plugins could in some cases lead to conflicting dependencies as multiple plugins require different, possibly incompatible versions of a dependency. This will result in the Jenkins deployment failing to run correctly, so be aware of the issue of having too many plugins.
Create your pipeline
Now we want to create our first Jenkins pipeline.
In the sidebar first select Back to Dashboard and then select the New Item option which will lead you to the pipeline creation menu.
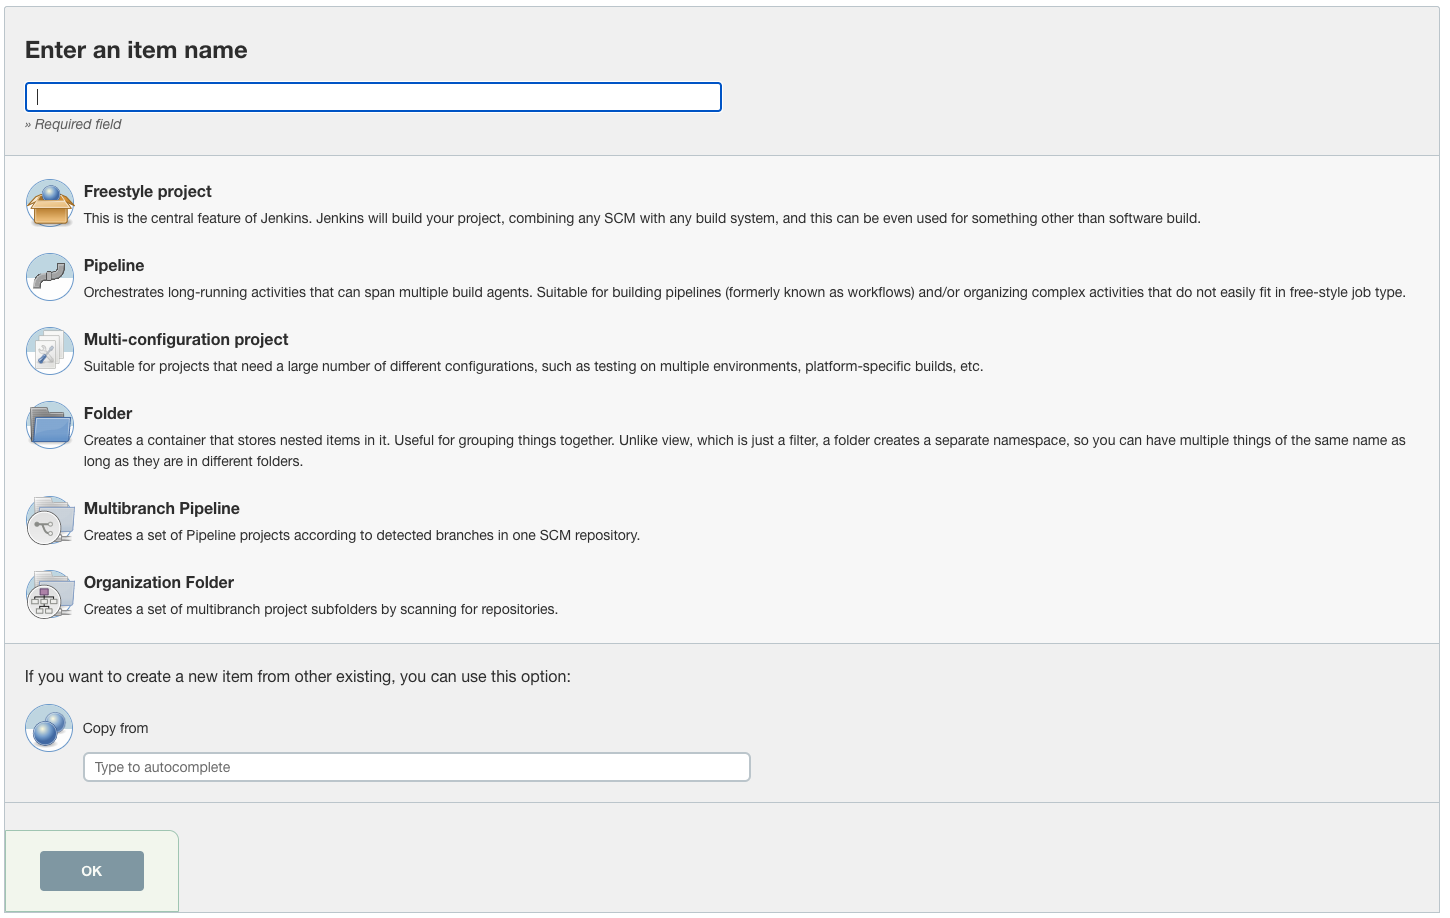
Here we will first define a name for our pipeline.
We want our pipeline name to be unique among all participants’ pipelines, so in order to identify our own pipeline and not to override any of the others, we want to prefix the pipeline name with a unique identifier such as your user-login studentX with the X representing your individual number.
For example a good pipeline name would be student1_first_pipeline.
As we want to start off with build pipelines, select the Pipeline option. In the following menu, we can define various parameters for our pipeline such as a description or build triggers. For now we will skip those segments and focus on the segment Definition at the bottom, which is where you can define the actual pipeline. You will see that you have two options in the drop-down menu:
- Pipeline script
- Pipeline script from SCM
We will start off with the first option for now, which allows us to directly type the pipeline definition into the text editor.
As a basic introduction, we want to show a hello-world example which simple writes “Hello World” to stdout.
pipeline {
  agent any

  stages {
    stage('Hello World') {
      steps {
        echo 'Hello World'
      }
    }
  }
}
Input the above pipeline definition. What does this definition do?
- agent specifies where to run to the pipeline.
Here we have what Jenkins calls a top level agent definition in which the entire pipeline runs in the specified agent - in this case, just any suitable agent. You can use this agent definition to specify exactly what type of container should be used. You could also define a different agent for specific stages instead of the entire pipeline.
- stages define a set of pipeline steps
Note that this is one of multiple possible syntax definitions for defining Jenkins. We will see a slightly different one later on so that you have seen the various ways of defining a pipeline.
Save your pipeline and in the upcoming menu press the Build Now option to start the pipeline. Now you will see the build starting in the sidebar
After some time, the build should show up as successful.
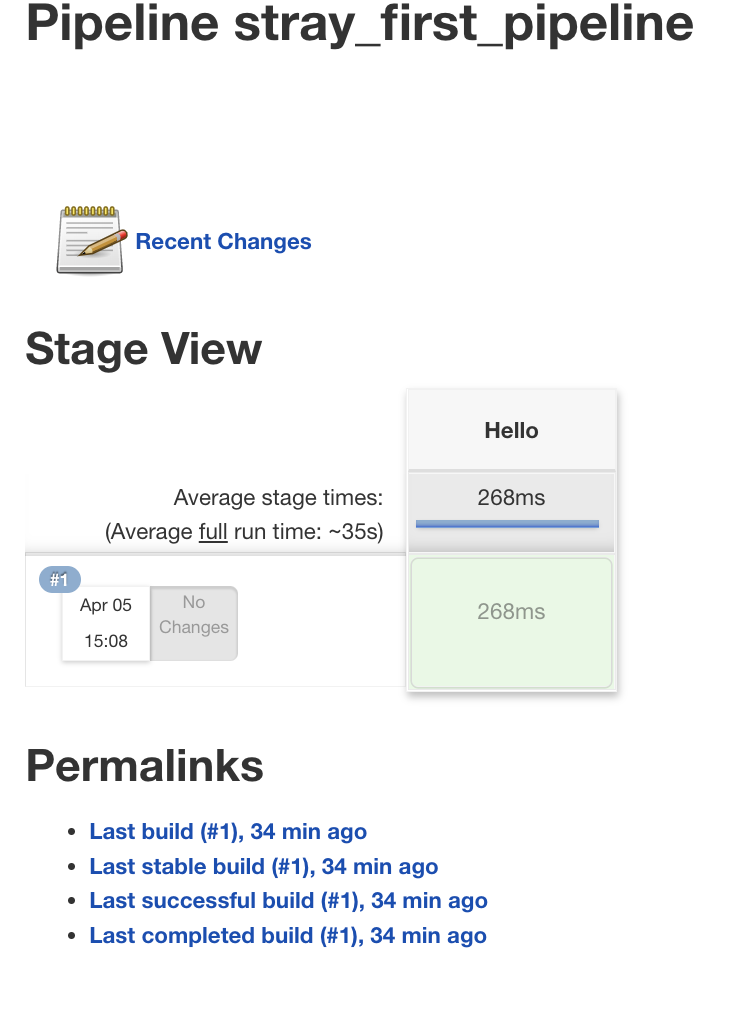
Now let’s go back to the landing page, i.e. the Dashboard.

The section in the middle that you will probably notice right away serves to display currently defined pipelines. Here you can view the status of your pipelines at a quick glance. The leftmost column displays whether the last try to run the pipeline was successful or has failed. The icon to the right displays an aggregation on the status of the pipeline as a whole: if the majority of runs were successful, the status icon will be displayed as sunny. Otherwise as cloudy or even rainy.
Feel free to see the output of your pipeline run by clicking on the pipeline-run’s id (probably #1 for your first run) followed by Console Output in the sidebar:
[Pipeline] {
[Pipeline] stage
[Pipeline] { (Hello World)
[Pipeline] echo
Hello World
[Pipeline] }
[Pipeline] // stage
[Pipeline] }
[Pipeline] // node
[Pipeline] End of Pipeline
Finished: SUCCESS
Build your own Application
Now we want to switch to actually creating a pipeline for your applications. For this, we are going to use the todolist-app once again, that can be found in https://cpjswd02.gitlab.cloudtrainings.online/NovatecConsulting/technologyconsulting-containerexerciseapp
Checkout git repository
The first thing we want to do is checkout the git repository.
So let’s modify our pipeline and try to set it up to pull our repository and build from it. To edit the pipeline again, go back into your pipeline and select the Configure option that appears in the sidebar. Delete the content of the pipeline and input the following definition.
podTemplate {
  node(POD_LABEL) {
    stage('Checkout Git') {
      git(
        url: 'https://cpjswd02.gitlab.cloudtrainings.online/NovatecConsulting/technologyconsulting-containerexerciseapp.git',
        branch: 'main'
      )
    }
  }
}
A few things are different than before.
The layout has changed from the pipeline {...} definition to a podTemplate {...} definition.
This is because now we want to utilize some functionalities provided by the Kubernetes plugin.
As mentioned previously, this is one of multiple ways to define a pipeline.
We will walk you through what the individual instructions mean with the help of the definitions taken from the documentation of the Jenkins-Kubernetes plugin
The Kubernetes plugin allocates Jenkins agents in Kubernetes pods.
In the beginning of above pipeline snippet we see the podTemplate which lets us define how we want to setup ephemeral Kubernetes pods that will execute the pipeline.
Now we see the node(—) definition. This is much like the agent in the previous example: this allocates an executor on a node (typically a build agent) and runs further code in the context of a workspace on that agent. For each node(‘some-label’) the Kubernetes cluster allocates a new pod to run the Jenkins agent.
This definition allows for a bit more control over where individual segments of your pipeline are executed, such as defining different containers for different stages. The specific term POD_LABEL is a functionality provided by the Kubernetes plugin that creates a unique identifier for the pod. This is how the pod template can be referred to when asking for an agent through the node step. The definition within the node should be familiar, here we use the same annotation for the stages.
You can save the above example and execute it to see if it runs correctly and the git repo is successfully checked out.
Build Todobackend
Next, we want to use a maven container to build our application. As our application consists of the components todobackend and todoui we will build each of those components separately.
Let’s start with the todobackend component. But to build that component, we have to define something else first: The backend component should be built using maven. Our Jenkins Agent currently does not have any maven capabilities. We are going to provide them by utilizing a maven container.
Please note that this is a big evolution, compared to Jenkins history. Usually teams have been tasked to install common version of build tools (like maven) on static Jenkins agent nodes. This became much easier by using containers. You’ll just tell Jenkins to run your commands inside a container - that’s it. That makes Jenkins operations less time-intensive.
Kubernetes podTemplates can be extended to use multiple containers for various build steps. So we will modify the top segment of our pipeline to include the following:
podTemplate(containers: [
  containerTemplate(name: 'maven', image: '--------', command: 'sleep', args: '99d')
]) {
  node(POD_LABEL) {
    stage('Checkout Git') {
      git(
        url: 'https://cpjswd02.gitlab.cloudtrainings.online/NovatecConsulting/technologyconsulting-containerexerciseapp.git',
        branch: 'main'
      )
    }
  }
}
For our pod, we define what containers the pod can use by providing a containerTemplate.
Each containerTemplate
defines a different container which we can use to run our build tasks in.
In this case, we are going to use the maven:3.8.7-eclipse-temurin-17-alpine image and have given it a short name maven to reference it later on when we build our application.
So fill in the ---- with the correct image name.
You might wonder about the sleep shoved in there in the command.
By setting this command we can override the predefined entrypoint
(if any) of the specified Docker Image.
Thus ensuring that our container is merely sleeping and not doing anything by itself then allows Jenkins to inject further commands into it without any interference.
And at the end of our pipeline run Jenkins can then easily terminate the Container (i.e. the Pod).
Now that we have the container defined, let’s get to building.
Add a new stage to the pipeline in which we want to use our maven container by adding the following snippet below the previously defined stage.
Please make sure that you define the stage within the node(POD_LABEL) block.
    stage('Build with Maven') {
      container('maven') {

      }
    }
What we are missing are instructions to actually build the todobackend component. For this, we have to do two things:
-
specify the subdirectory of our component that we want to build
-
use the
mvn clean package --batch-mode -DskipTestscommand to build the component
Specifying the directory for this build is done by adding and running
        dir('-----') {
          ------
}Go ahead and save the changes and then run the build again. After a short while you will see the build results, which should show that the build was successful and maven was able to build our application.
You can select the successful build from the sidebar to open more details and options for this build run. Here you can feel free to take a look at the more detailed Status or even look into the Console Output during the build, which might come in handy should a build fail.
Info
If you change the names or the number of pipeline stages in your pipeline, the Stage view will break and no longer show older builds. The build history on the left won’t be affected though, there you can still see all of your past pipeline runs. When changing something inside the steps the history will be retained and you can visually see at which stage a failure did occur.
Adding TodoUI build
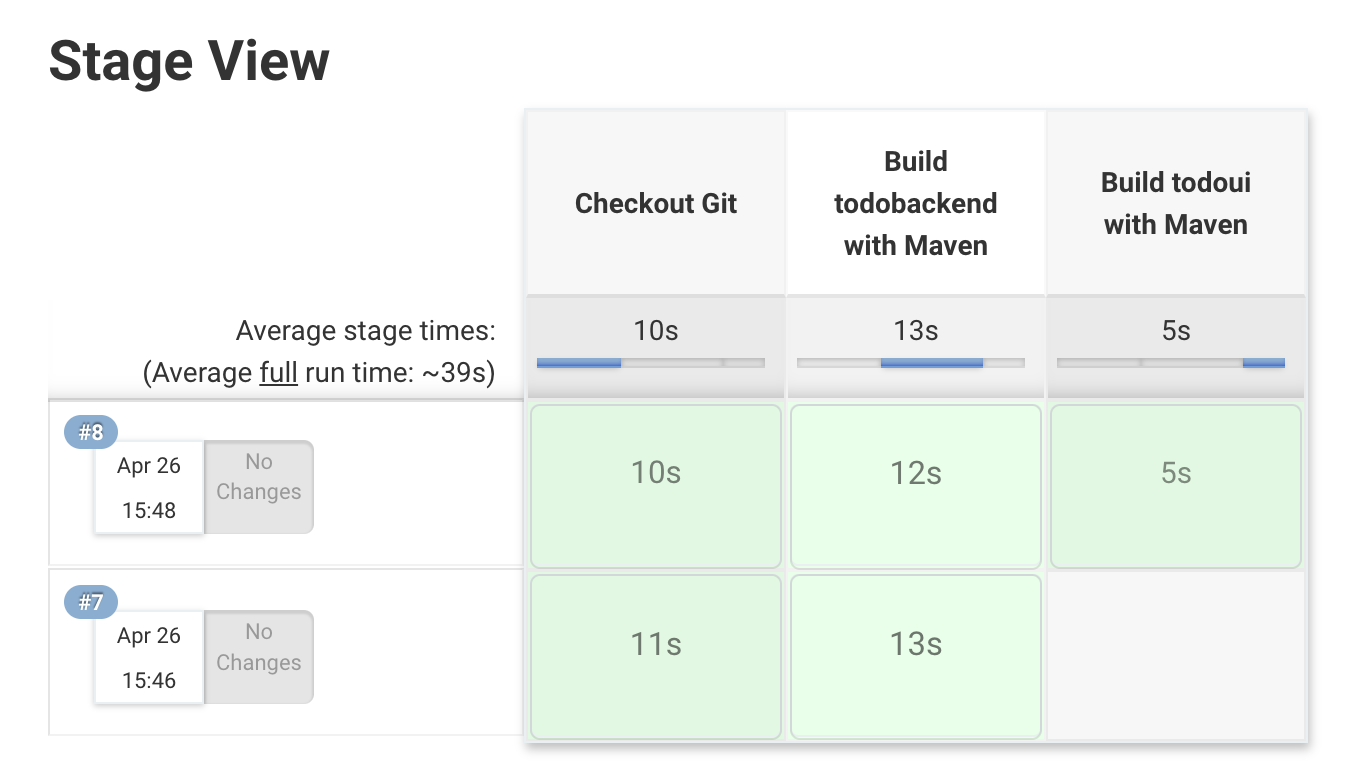
Now let’s add another stage after the todobackend to build the UI component as well. Repeat the same steps as above but change the directory and stage name accordingly to build todoui instead.
After about 100 ;-) attempts your resulting view should look somewhat similar to this one: