Continuous Deployment I
In this exercise, the goal will be to deploy an application from a git repository via ArgoCD to the Kubernetes Cluster. For this exercise, we have selected three different setups that we will deploy in steps using the ArgoCD instance as provided for you for the course of these exercises. We will start with an initial setup of the application that should contain the following components:
- todoui
- todoui-service
- todobackend
- todobackend-service
- postgres
- postgres-service
- postgres-configmap
- postgres-secret
During the kubernetes exercise sections, we have done modifications only to a locally cloned git repository and to files that lie within the root folder of the repo. But in order to deploy applications continuously ArgoCD requires
- a path to a (sub)directory in which the components of the application to be deployed are bundled
- the changes we have made to be present in a remote repository from which ArgoCD deploys.
We have done the necessary preparations for you in GitLab and included all necessary files under the subdirectory todolist-app.
Info
You don’t know what this is referring to? Well, in the previous chapters we started to investigate Pipelines-as-Code stored in GitLab, and it is this GitLab repository that we need now. Please check How to create a Fork on GitLab for details on how to get this repository ready.
Open the repository of your personal fork in GitLab and take a look at the included files here to get an understanding of what the initial deployment will consist of. You should see the following:
└── todolist-app
    ├── postgres-configmap.yaml
    ├── postgres-secret.yaml
    ├── postgres-service.yaml
    ├── postgres.yaml
    ├── todobackend-service.yaml
    ├── todobackend.yaml
    ├── todoui-service.yaml
    ├── todoui.yaml
This subdirectory includes files to tell argo what it should deploy.
You might have noticed that in contrast to the files from the kubernetes section, the files in the new subdirectory are missing the namespace definition.
This is because we want to set the namespace dynamically through the UI of ArgoCD later on.
Info
Add git repository to ArgoCD
Now we have to add our repository to ArgoCD so that it can access our repo to create deployments from it.
In ArgoCD select the settings in the left sidebar and open the Repositories menu. Here you can choose to connect your repository either via HTTPS or SSH, just enter the corresponding URL that you’d use to clone your repo.

Select either one and in the new menu, input your clone URL and - if your repo is not public - your corresponding credentials.
Warning
Please make sure to specify the full repository URL, i.e. including the trailing .git, as ArgoCD won’t follow any redirects but strictly requires the final URL.
As project, select default as we will deploy our applications inside this project.
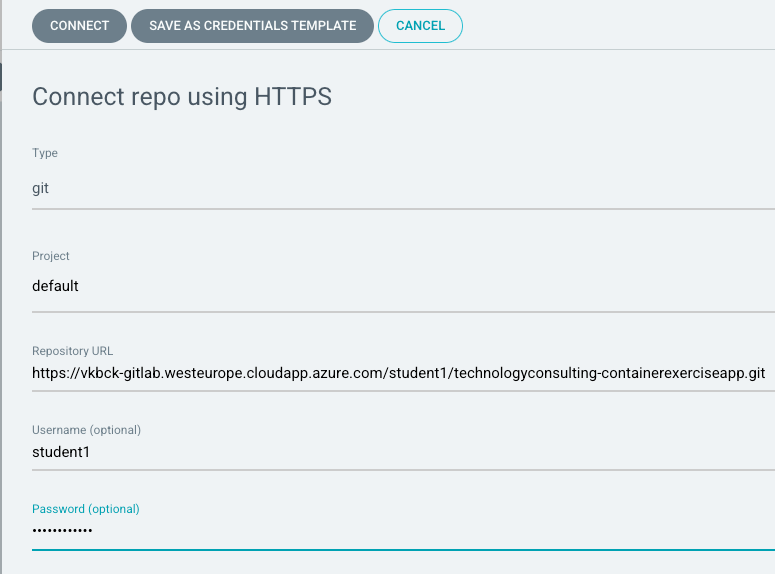
Press Connect and you should see your repository be added to the list of repositories.

Deployment
In this part of the exercise, we will use ArgoCD to deploy the application from a repository in GitLab to the Kubernetes Cluster. For this, we have created the above mentioned default project inside ArgoCD that you can access and deploy your application to.
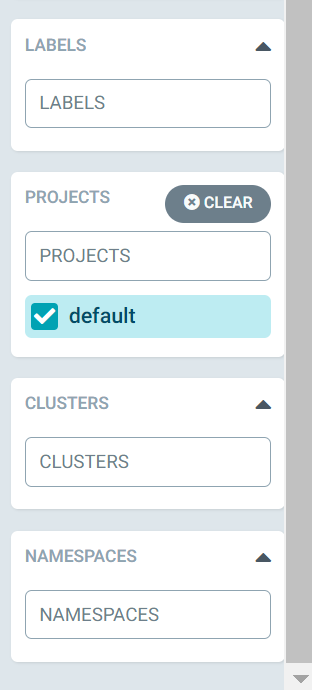
The sidebar on the left side offers the option to filter applications based on the state, project or namespace that they are in. If we were to use multiple projects, this option would offer us to instead of the default project, only display applications of a specific project for more clarity.
Create new application
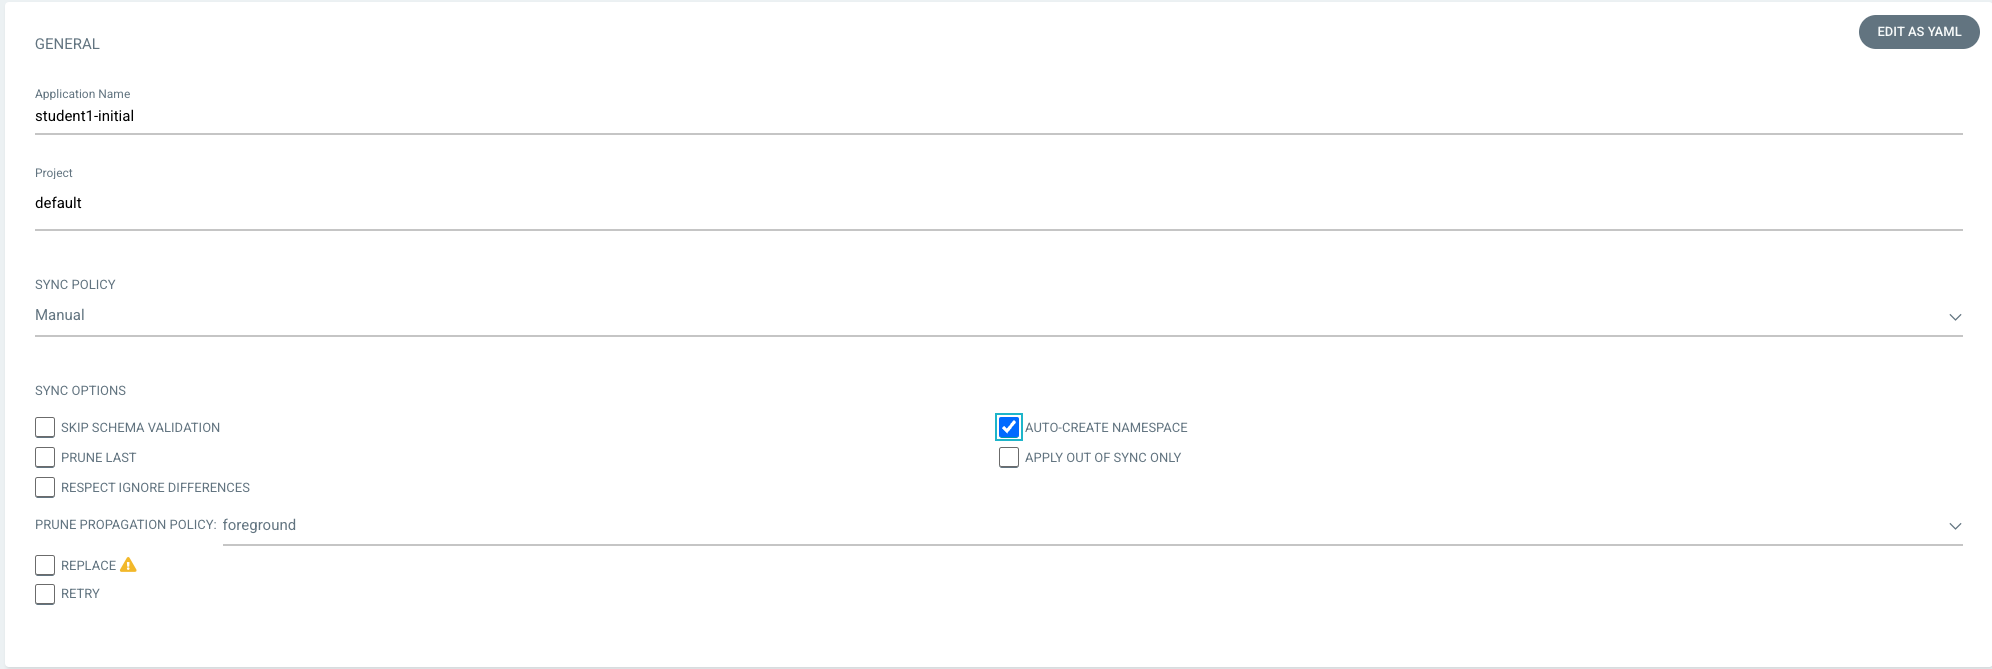
Go back to the Applications screen and on the top select to create a new application. Here you will have to add the repository information. For the course of this exercise your app will be deployed among the apps of all other participants, so we need some means to identify your own app from the other apps within the project later on. Therefore, for the name of the app we want to include any means of a unique identifier such as your vm-login or your lastname. In my case; student1-initial.
As project destination we want to select the default project, as we have assigned all participants to this project for demo purposes.
Make sure to check the Auto-Create Namespace Option.
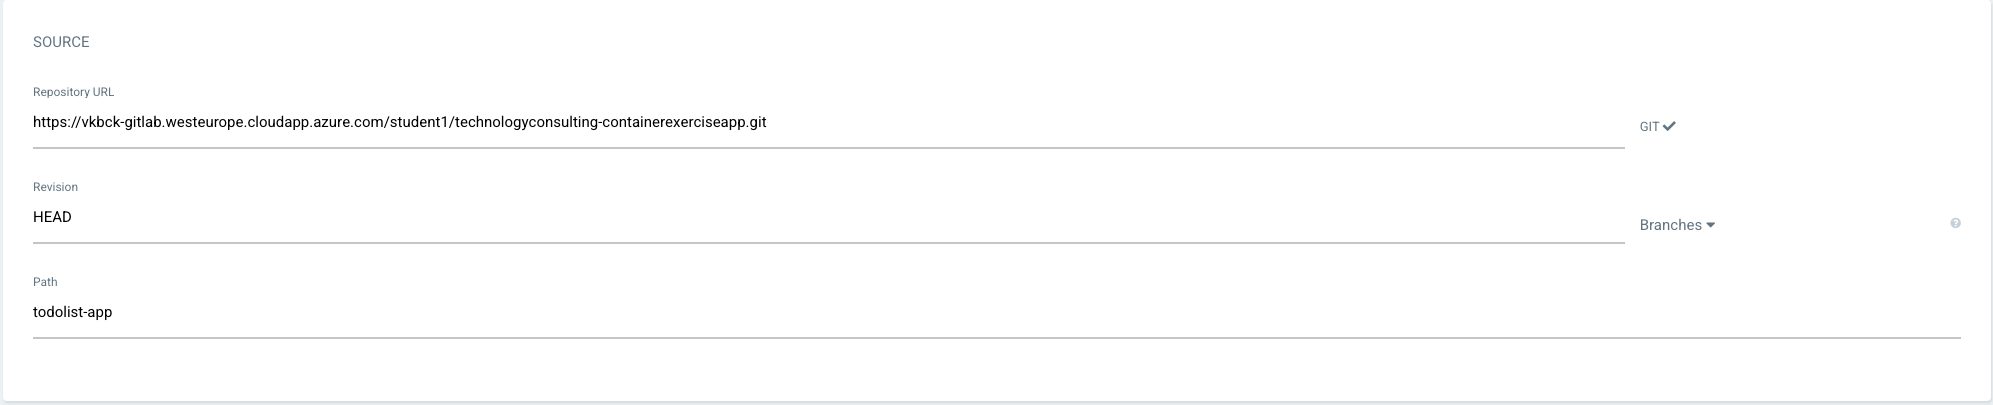
In the Source section, select your repository from the drop-down menu or paste the clone url directly.
As path we want to input the subdirectory todolist-app, see above.
This won’t appear in the dropdown menu so type the directory name in manually.
In the Destination section, select the cluster from the drop-down menu and input your personal namespace.
As for this exercise scenario, where everyone will be deploying an identical application, we want to have them in separated namespaces. Therefore, you want to select a namespace definition that is unique within the project. As was the case with the application name; adding your username as prefix to the namespace is an easy way to ensure this for the exercises.

Now press Create and you should see your app added. The status of the newly created app will show as “out of sync”.
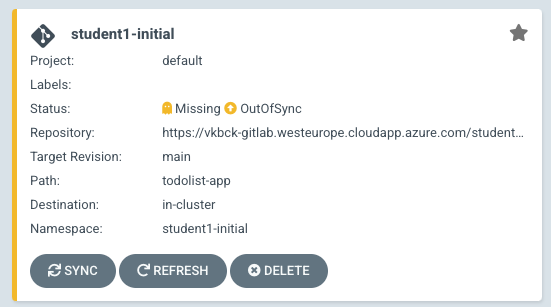
So go ahead, open the app info and press Sync now.
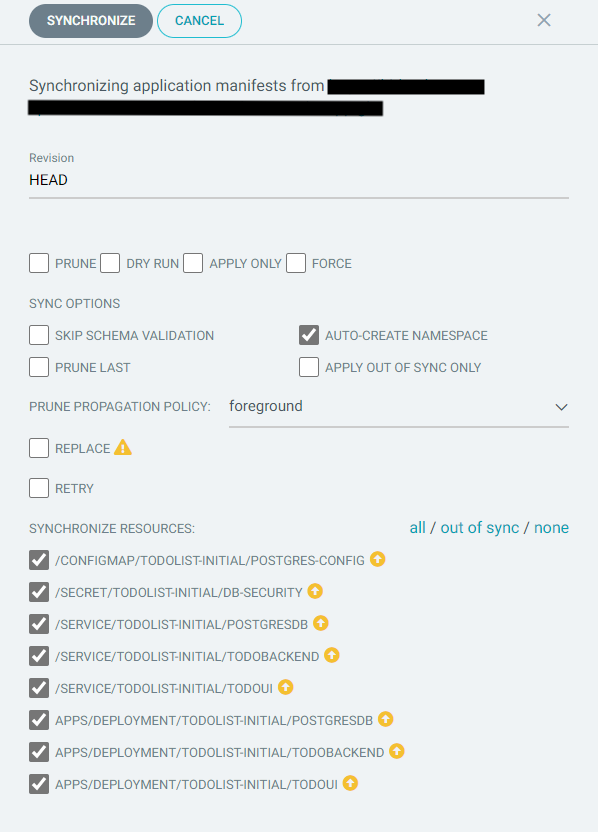
After some time, your app should successfully sync and all components should show up as healthy as indicated by the green heart.

Congratulations on your first deployment!