Continuous Deployment II
The next step is to update our previously deployed application on ArgoCD which currently reflects the initial setup. We want the deployed application to reflect modifications to storage capacities and the persistence configuration as we have done in the Kubernetes/Storage section.
Thus, let’s update our subfolder todolist-app to include the corresponding changes.
Once again, you can either use the WEB IDE or modify the files locally.
Make sure to replace the contents of postgres.yaml with the following which was extended to contain persistent storage functionality
UI namespace filters
At this point, there will most likely be quite a few applications that have been deployed to the current project so finding your application can be tedious. Luckily, the sidebar offers an option to filter the visible applications based on the namespace in which they are in.
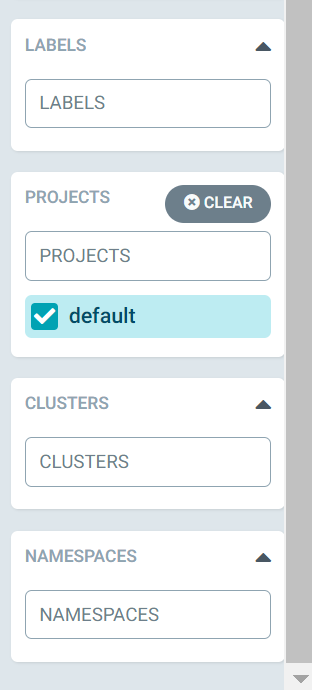
Go ahead and in the namespace option input your applications namespace.
Now you will see only the applications that you have created and are responsible for.
Auto-Sync vs Manual Pull policy
Taking a look at our application in ArgoCD, you will notice that the status of the application will now show as “out of sync”. (And if it doesn’t yet, please just manually trigger a Refresh.) As we have pushed changes to the repository that are not yet present in the deployed version of the application, ArgoCD notices the discrepancy and displays the application as out of sync.
Why does it not continuously deploy the new status of our application?
That is because when we deployed our application, we chose to opt in for manual syncing. Thus, ArgoCD will notice and inform you that an application is out of sync with the changes made to the repo, but leaves it up to you to decide when to update it.
When choosing the Auto-Sync option in the application configuration, ArgoCD will switch to, as the name implies, automatically synchronize and update the deployed application whenever changes to the repository are made.
Let’s test the Auto-Sync option by going “into” your application tab and then to the App Details in the top-left corner, then scrolling down and enabling Auto-Sync.
Now you should see that the application in ArgoCD changes its status to Syncing and after a short time it should change it to Healthy as well.
What has changed
Let’s take a closer look at the newly deployed application and at the difference in comparison to the initial setup. So open the details on the deployed storage application to view the components and try to spot which ones are new or different.
We’ll include the two setups here as well for a quick comparison.
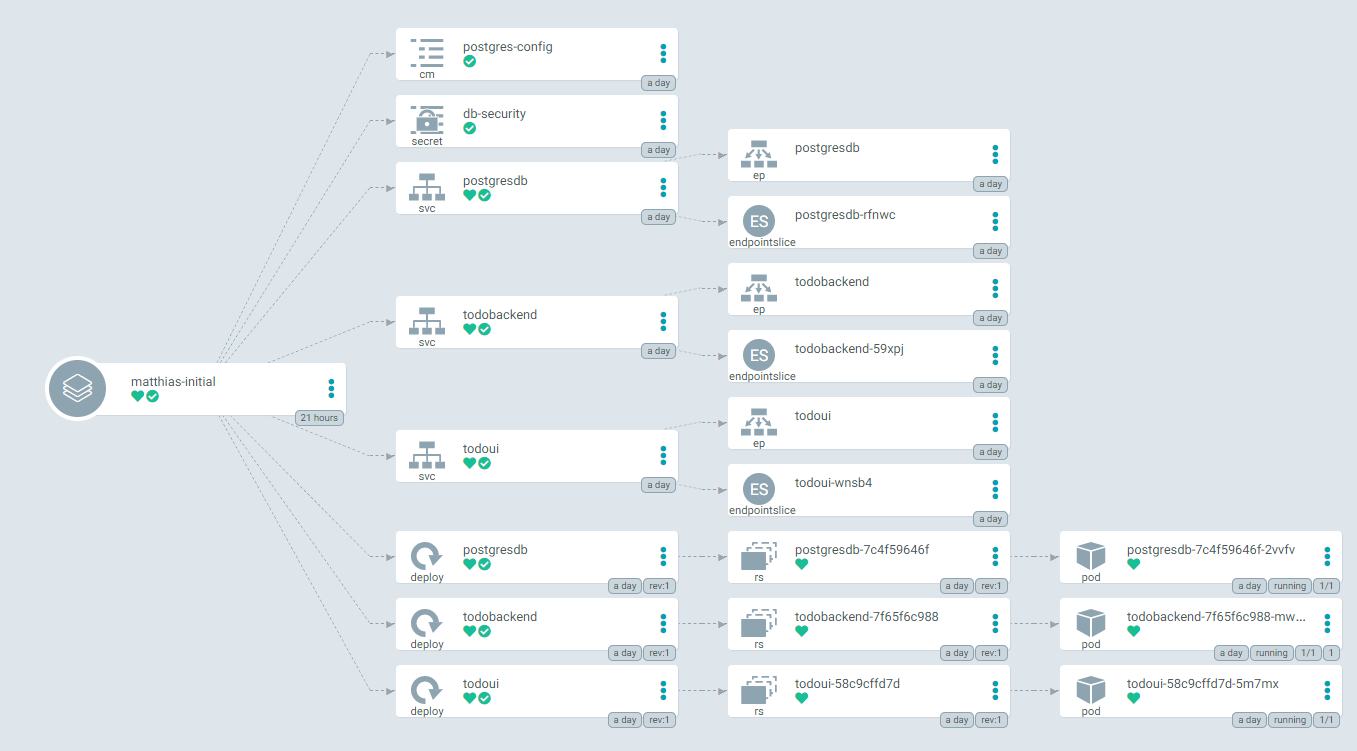
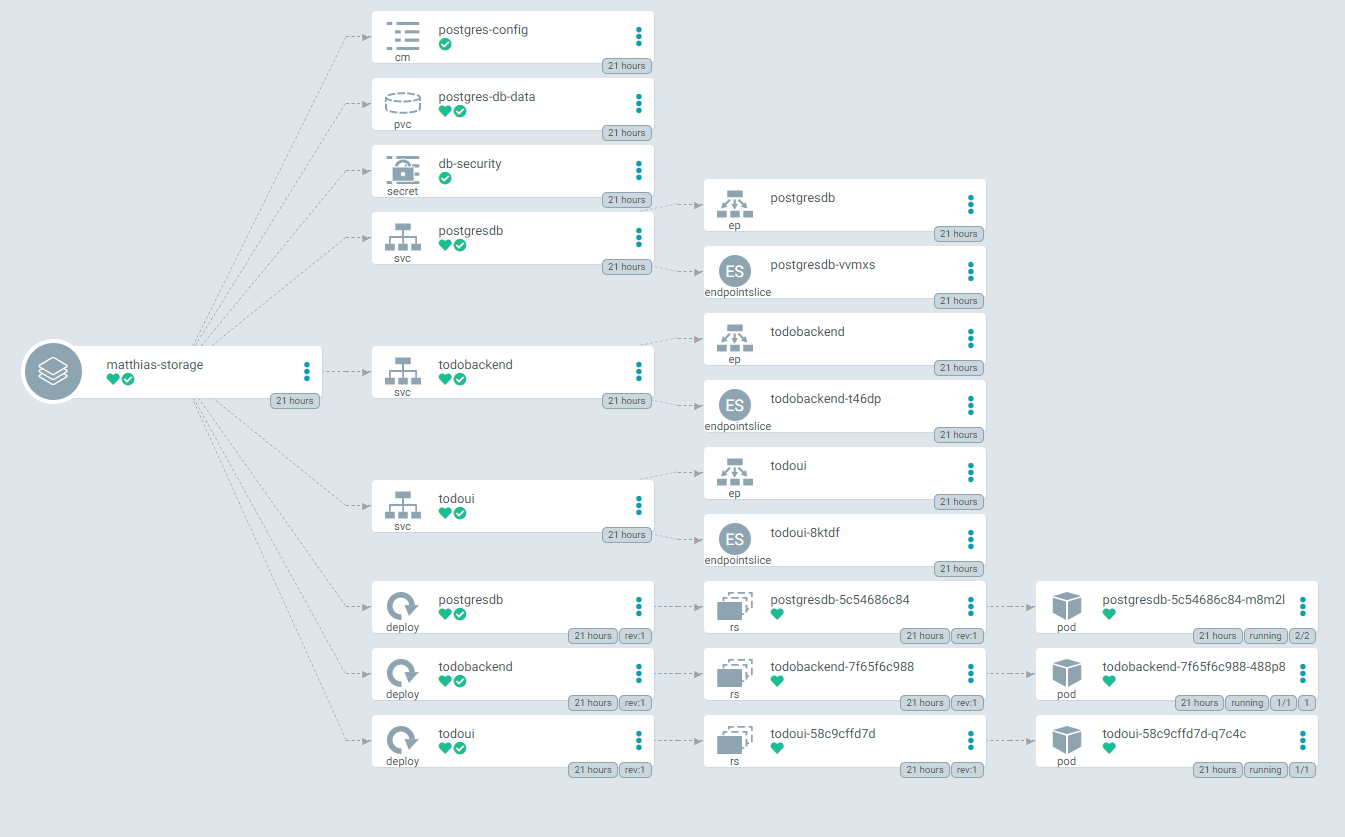
You should notice that the storage setup includes a new component: postgres-db-data of type pvc (persistent volume claim).
Add Ingress capabilities
Let’s make a further change to the deployed application. During this section of the exercise our goal is to extend the application with the Ingress networking capabilities as you have learned in the corresponding kubernetes chapter .
As you might have noticed, the todoui-service in the todolist-initial and todolist-storage setup was changed to ClusterIP instead of LoadBalancer, meaning that it currently is not directly exposed. Therefore we currently have no means to access the UI directly. To change that, we want to modify the application once more to expose the UI via Ingress.
In our repository, create a new yaml file todoui-ingress.yaml within the todolist-app directory and try to fill it yourself in order to expose the todoui service using Ingress.
Again you can either use the Web IDE or the VMs terminal.
Commit and push your changes to your fork. Now you should soon see that the todolist-app application will display out of sync message.
If the application is still set to Auto-Sync it should start the sync process right away. Otherwise, sync it manually once more and wait until the sync finishes.
After some time you should see a that the application was extended with the Ingress component.
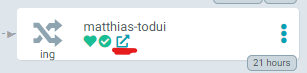
The hyperlink-icon within that component should get you to the UI. It is the very same host that you have configured in your Ingress ressource, of course.
Congratulations! You’ve successfully deployed your application and made it accessible from the outside world.